
Hello everyone ! Welcome back ! Each year I struggle with the greyness, coldness and emptiness of Winter. And each year, the arrival of Spring makes me so happy and alive again. Spring is really my Easter, my rising from the dead, my resurection indeed. Lately, with the flowers blooming back, the sun shining back and the birds singing back, my heart has been filled with a vision. A vision for my room. It already went through a few changes and updates along the years, but still it felt unfinished, like there was still something to be done. And it stayed this way for a few years. Until a few months ago. I was looking at the built-ins on one side of the room. The sun was shining outside, everything was quiet; you could only hear the wind slowly dancing through the willow and the chickadees singing. It was so peaceful and so beautiful. I was looking at the built-ins, thinking how it lacked something but not that much; then, only God knows how, it came into my mind. I suddenly knew what I was gonna do about these built-ins. Then it flowed into me, all the ideas. It was all there, in the peace and beauty of Spring. And laid too the certainty that I could do it.
The following days, I made a plan, took some measures and put on paper the theory of my ideas. Then, little by little, I did it.
What I want to share with you today isn’t necessarily the final look, but rather how these changes I made changed the room and most importantly gave it some character and that feeling of being finished, polished. Because I’ve realized from my own experience that the hardest into a room makeover is not the making itself, it’s the designing, the searching for ideas on what to do. And since it’s one of the first step, the fact that it’s so hard to get by sometimes, makes the whole process difficult and endless. So I hope I may give some ideas to some people and save them a few years while renovating or just reimagining their spaces.
Let’s get started !
First, here is a look at what the room looked like before I started these changes: a room with potential but no real aesthetic, a lot of mess, some outdated elements. The room had already evolved but still some work was needed.
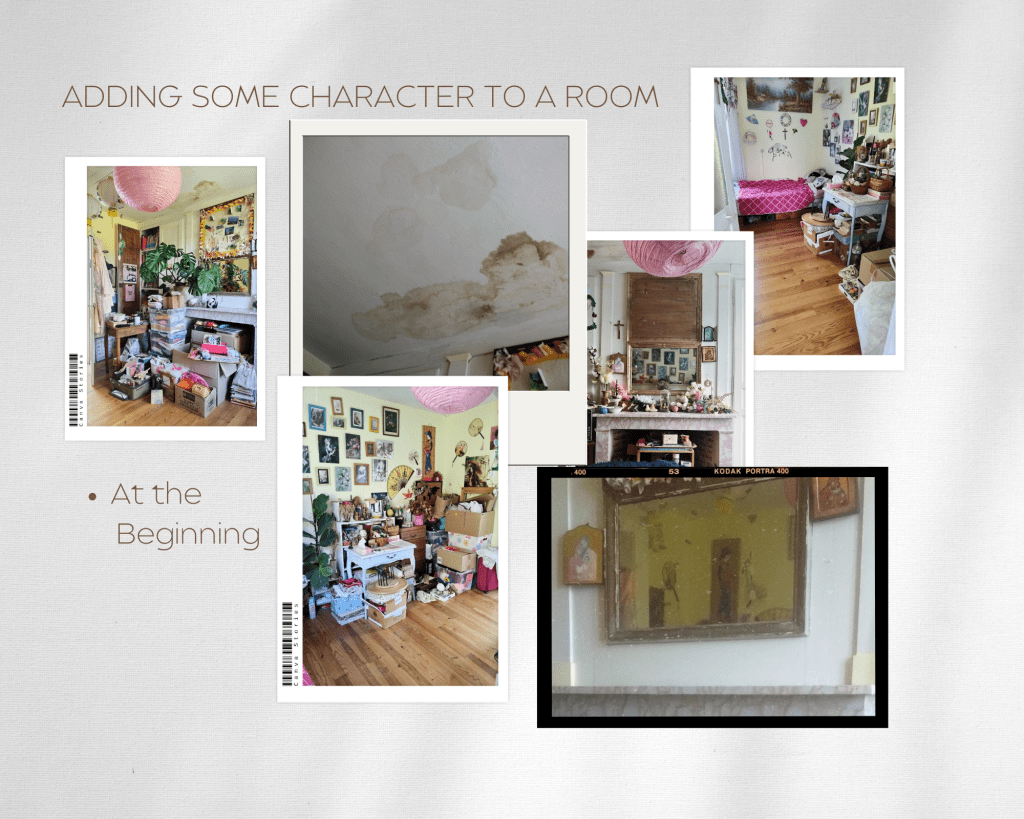
To get from this state, a banal room, to an elevated room that makes you feel something, you’ll need a few things:
- A large-scale piece that gives volume to the room
- That same piece or another piece that centers the room and make it intended and cohesive
- Art pieces, a large one and smaller ones; one the very first purposes of art is to give character to the room where it is displayed
- A bit (or a lot) of whimsical, that’ll tie everything together by being everywhere in the room and that’ll give the room that elevated look, that something different.
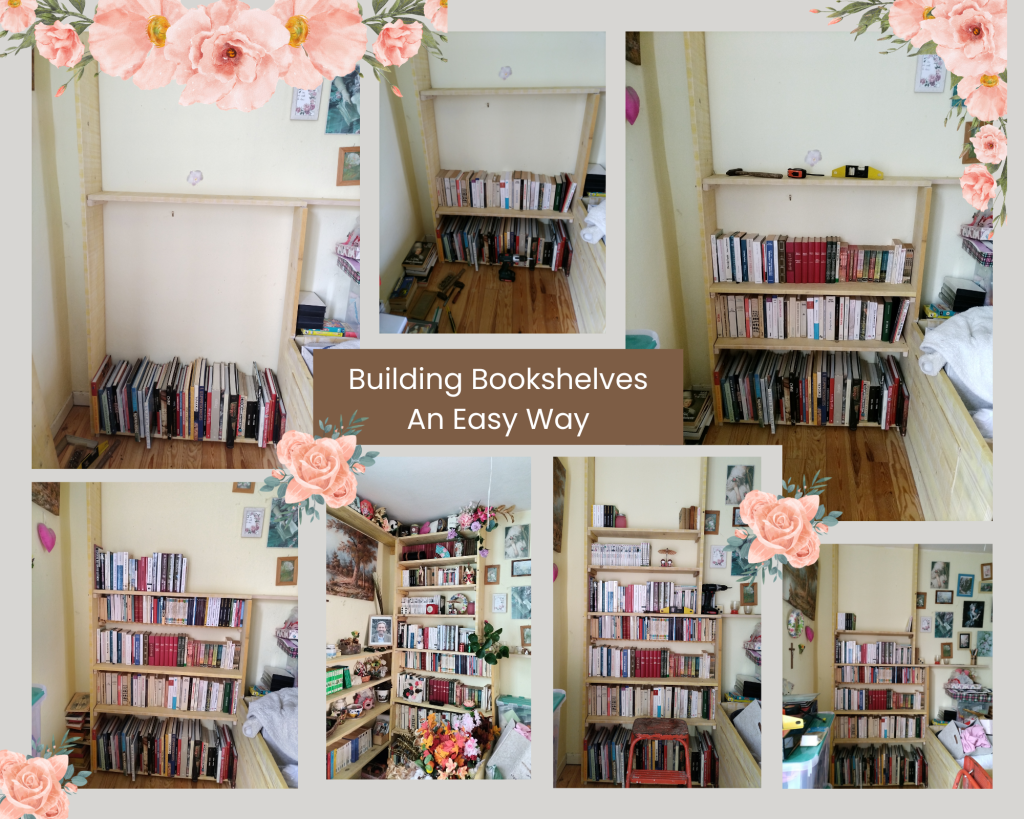
1# Large-scale bookshelves – Making an impact and giving volume to the room
The purpose for these for me was double. First, it would store all my books and others things I had laying around. Second, it would make an impact into the room and give that very character it was missing and that I was looking for.
The bookshelves and bed frame (this one comes in the next part) were two things I’ve wanted to do for a very long time in this room. But I simply never found the courage to start. I needed to a proper plan with actual measurement, I needed wood (lots of). But this time, I took the effort and finally achieve that long dream of mine. And today, I’m so proud of myself, of all this work I did all by myself, without any help. And I kinda regret not having done it sooner, while my father was alive. Because, even if I’ve shown my progress and the final results to one of my colleagues who did praise me and encourage me, I cannot show it to my father and see the look that would have been on his face. I’m getting emotionnal. Let’s get back to the topic !
Actually, making these simple-designed bookshelves is quite easy. As you can see on my pictures, you need two boards for the sides, one board and two wedges for each shelf. The idea is quite simple. You screw the wedges on both sides and place the flat board on them, between the sides. You’ll need to screw the horizontal pieces into the wedges only for the very bottom one and a few top ones. No need to screw all the shelves, as long as there are at least 2 of them and that at least one side is attached to the wall. In my case, I kinda cheated and didn’t attach the bookshelves to the walls, since it was part of a bigger ensemble, including the bed frame. You would attach the bookshelves to the wall to secure them and make sure they don’t fall. This is the role of the few screws into both the wood and the wall. But in my case, that role was fulfilled by the bed frame. It is the bed frame that prevents the bookshelves from moving. This is why I could skip the “attached-to-the-wall” step.
I really enjoyed building these bookshelves, even if the cutting and sanding part was the longest and most boring part of the whole process.But apart from that, it took me only a few days, maybe a week, to complete all the bookshelf parts. And it took me that long because I work, so I couldn’t be 100% on that project.
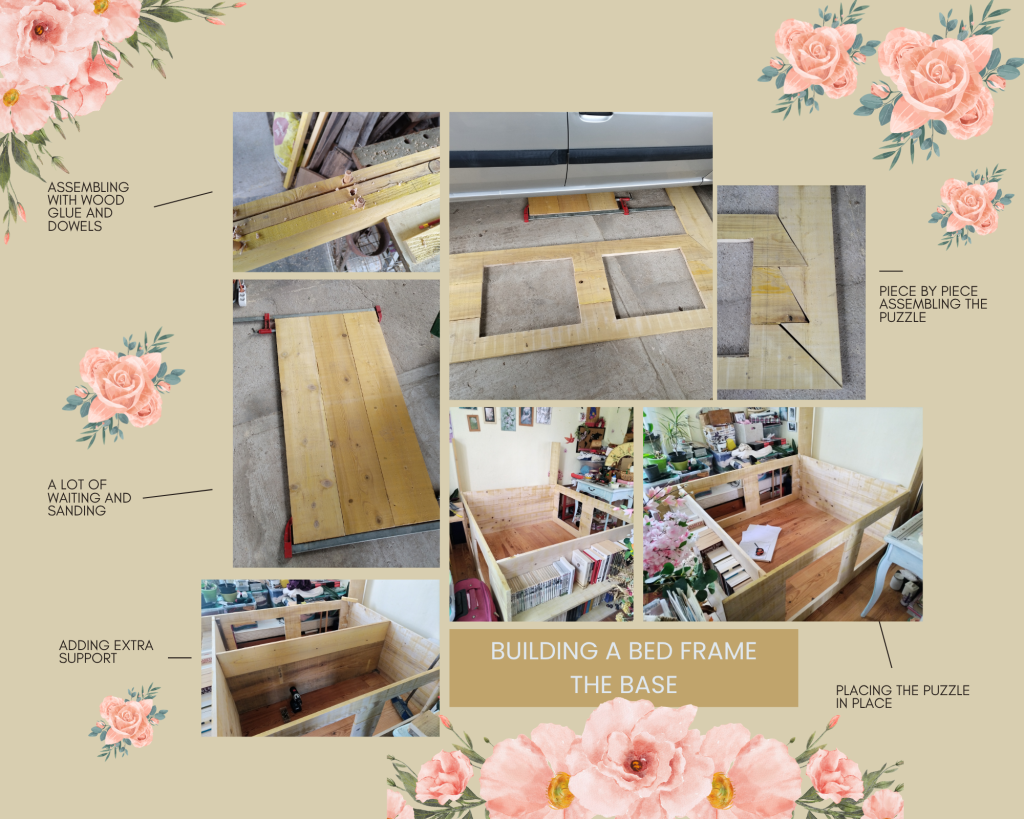
2# Custom-made Bed Frame – Centering the Room
This is actually the piece I started working on, since it had to be centered into the room, with the mantle and cabinets on the other side of the room. To be honest, before starting this project I thought I would build completely the bed frame and then get to the bookshelves part. But I got kinda stuck along the way, so I decided to take a break from the bed frame and work on something else, something that would allow me to empty the room all around me and bring back civilization to that room. Because it was getting quite chaotic and overwhelming in there. So I’m glad I did it this way, it motivated me so much more.
This was a bit tricky at first because it had to be part of a bigger ensemble with the bookshelves and because I wanted a tall bed frame, one that would feel more expensive, more princessy I guess… So it naturally added some steps. I had to assemble some boards together to create larger panels. I had to make different angle-cuts so that everything would hold strong. And I had to make some cuts for future drawers. These drawers were a very important part of the bed frame since I was losing quite a lot of surface in the room and ejecting almost all of the furniture aka storage. And since the space was lost to the bed, I had to save as much as I could for storage underneath. I also saved more space by integrating a two-shelves bookshelf at the end of the frame. Adding that spot was very easy, I just had to move a bit the bottom side of the frame. Plus it allows this piece to be more supportive for the whole structure since the bottom of the bed isn’t where most of the weight will be. The more you get to the center of the bed the more weight and pressure the structure feels. Consequently, adding that mini-bookshelf wasn’t only practical and aesthetic, it was also mechanical, making the structure stronger.
The longest part was cutting and assembling all the parts for the two sides: getting the height I wanted, making the holes for the drawers and making sure it would effectively tie with the bookshelves.
Then I needed the top and bottom panels, to close and give support and strength to the frame. And lastly a central panel inside to add extra support in the middle where most of the weight (my weight) would lay down.
Following it was time to work on the storage part. I first created some semi-floors for the drawers to lay down and slide on. I used some ugly wood scrapes and leftovers of flooring (faux parquet) to creat these 4 platforms.
Once these semi-floors were done, it was time to move on the actual drawers. These are actual boxes I made with 4 side panels and a bottom panel made with some more faux-parquet leftovers. For each box I also cut a front piece that would match the exterior of the bed frame.
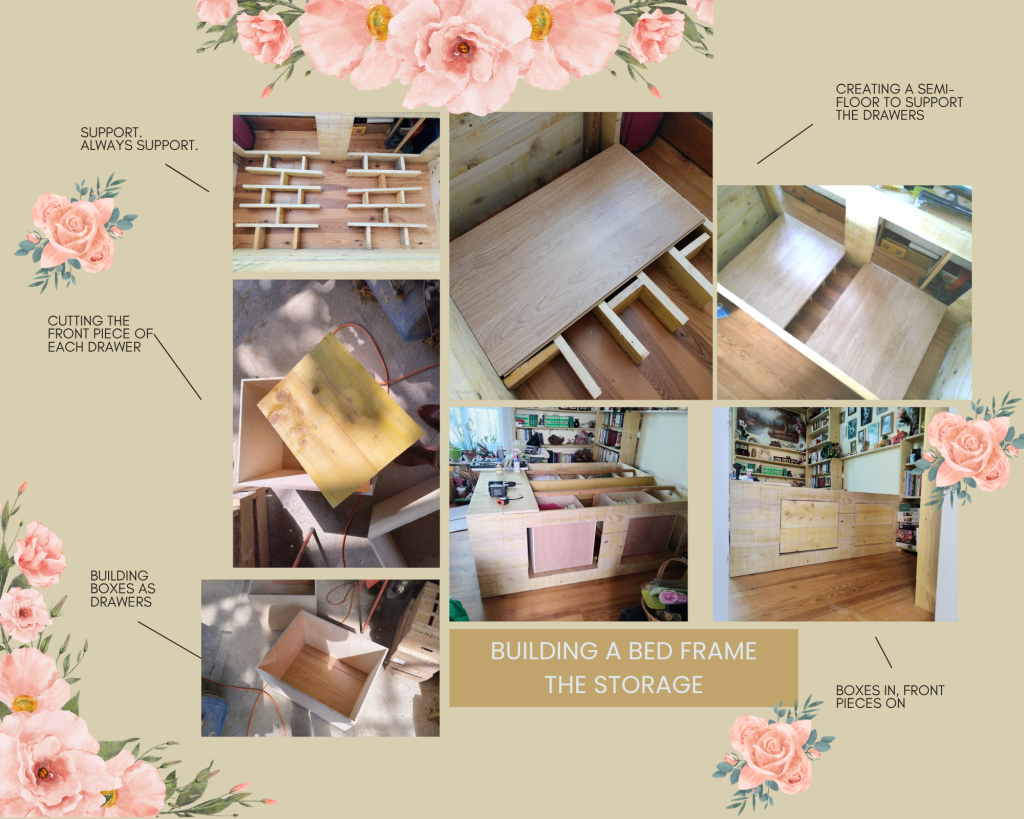
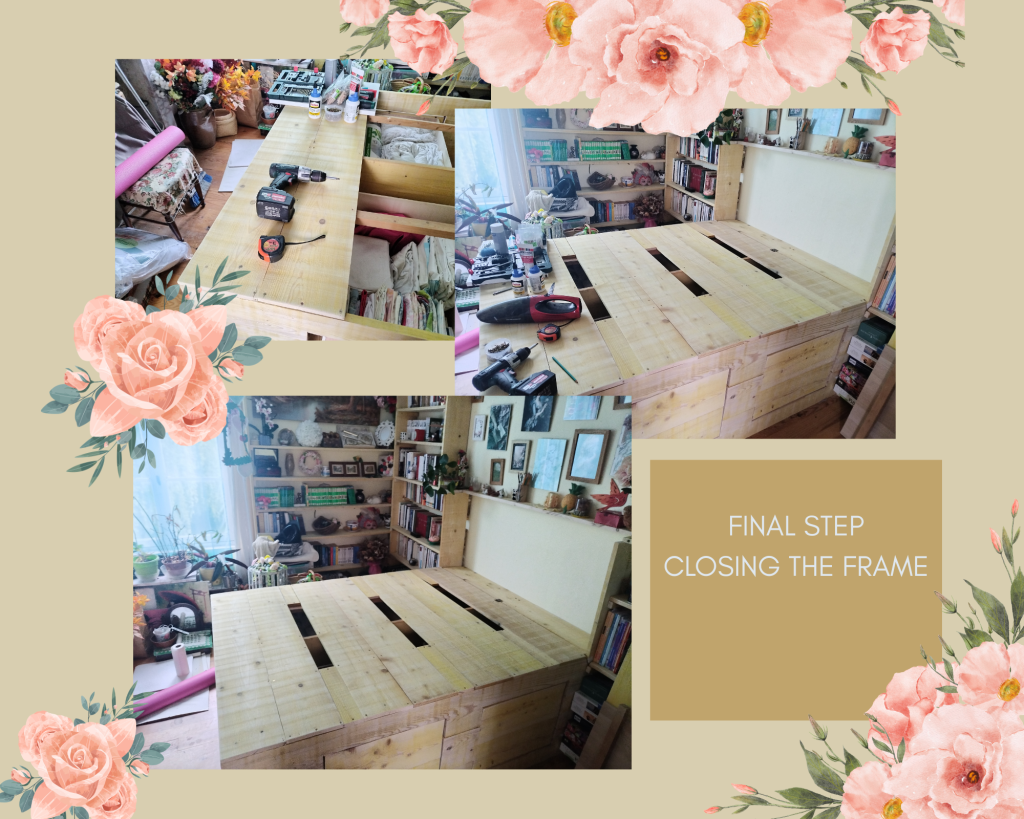
Finally, about 2 months after starting this project, it was time to close the whole structure. At first, I wanted to close it completely, but after thinking I realized it would be better to leave some space for breathing. And since the mattress was going on top, no one would notice.
And there it was finished, I could move back into the room and not sleep on the floor anymore. That first night felt both vertiginous and luxurious.
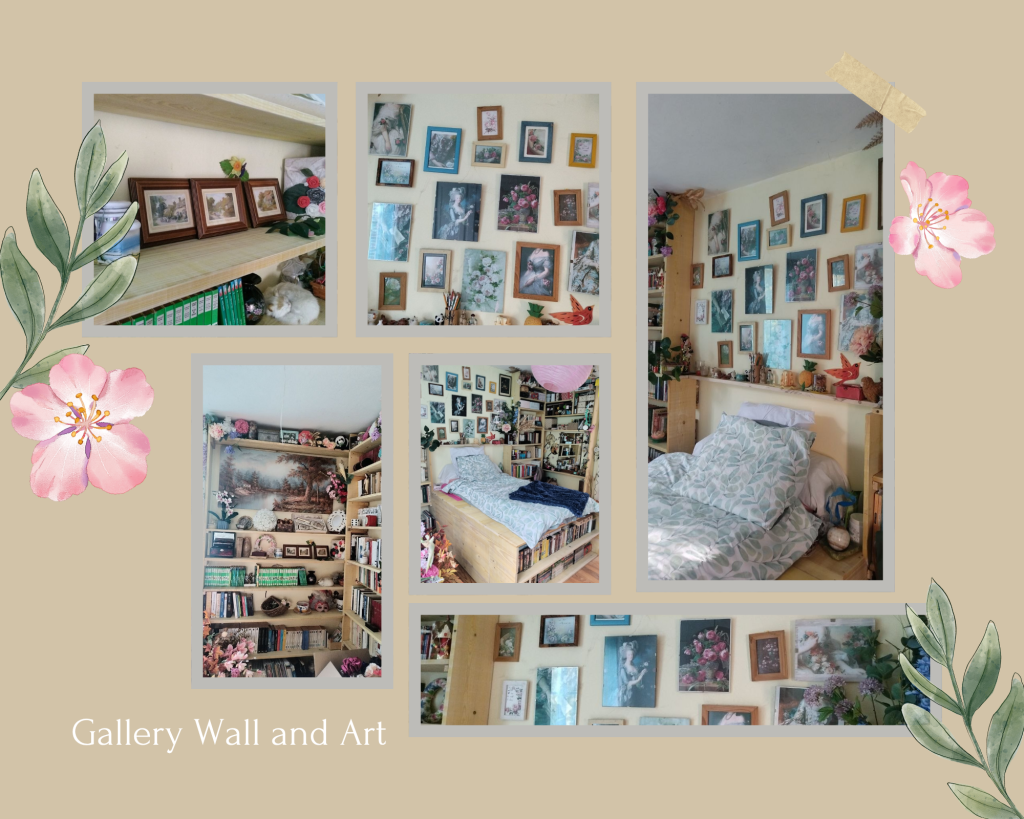
3# Gallery Wall and Art Pieces everywhere – Making a room sophisticated effortlessly
That part was quite the easiest since it was already done. I had made this gallery wall a few years ago (more info in that post, Decluttering and Updating my Bedroom). This was also one of the things I wanted to keep in the room and build the room around. Quite luckily for me, this gallery wall was already centered on the wall, facing the mantle and mirror. It just added some difficulty when I designed and measured for the bed frame and bookshelves since the whole structure had to be built around this gallery wall. And honestly I can tell that taking some time for measuring, more than once, and for doing some math, is absolutely worth the shot. When building my bookshelves, I ended up multiples times with my pice of wood at the right spot. These moments you experience perfection in the detail.
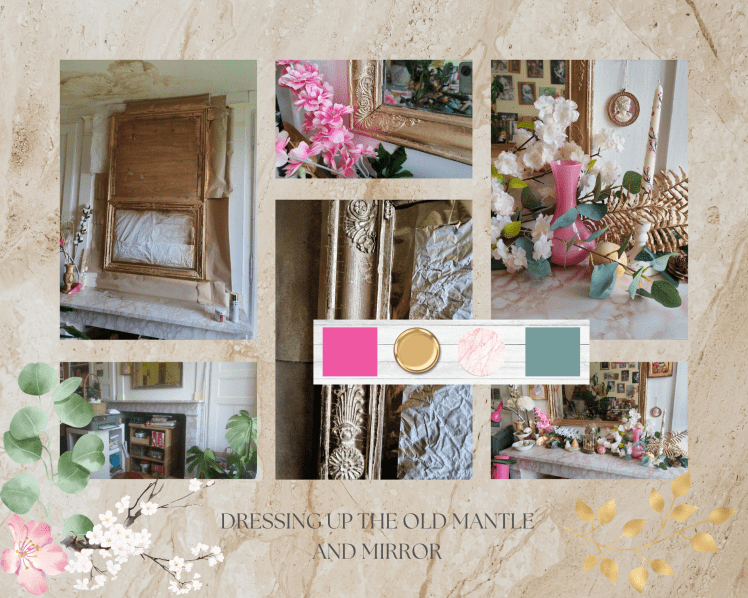
4# Personal touches – When the room gets its own depth, feelings and personality
Adding character to a room isn’t only about big changes, it is also about some details. A matter of color, texture, lightning. A matter of feeling. The feeling that everything is in complete harmony into the space and with yourself, with your heart, what it asks for.
The first thing I did, years ago, was to cover the actual marble of the mantle with an adhesive paper. The original marble was kinda purple dark, not really my taste and it was a bit damaged at a few spots. Covering it with a pink marble paper instantly changed the whole mood. The space got a lot lighter. And it stayed this way for a few years. And recently the paint on the frames started to irritate me. It was an old kinda golden paint that was chipping away. So I took a bottle of gold spray paint. Now it feels more like me. It’s cleaner, lighter, richer, more feminine.
And once I added some faux flowers, eucalyptus, golden leaves, some marble pieces, my gold-and-glass clock, candles, the whole thing blossomed. It was perfect, and even more with the sunshine gently touching it.
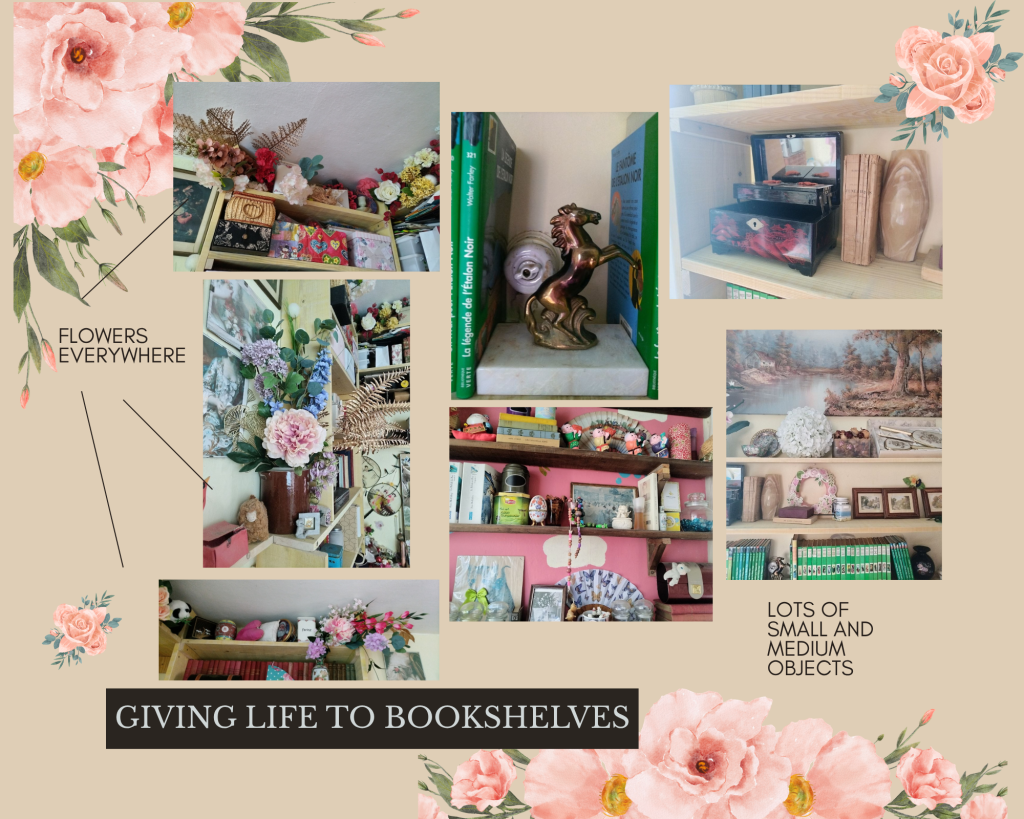
Another great way to add character to a room is to give life to its bookshelves. Since these are such a big, impactful piece of furniture in the room, the way they are arranged can affect so much the atmosphere of the room, its feeling.
As someone who loves to collect things, I can tell you the best way to give life to your booshelves is to fill it up with lots of things. Things that are old, vintage; it’ll give depth to these bookshelves. Things that are beautiful, sparkly, flowery; it’ll give dimension and charisma. Things that are personnal, dear to your heart; it’ll give feelings and softness. Things that you like; it’ll give attachment. All combined, these things will give life to the bookshelves which are gonna start telling you stories, comforting you, encouraging you, inspiring you. And then, the room will also feel alive and talk to you.
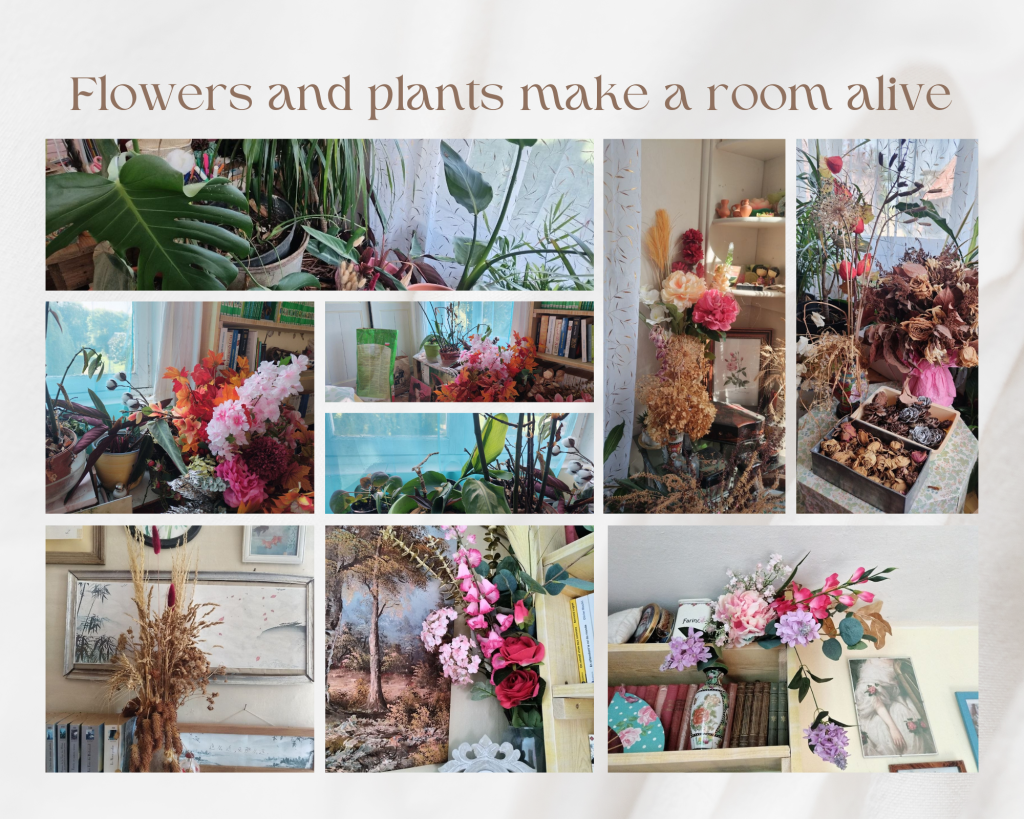
You can also make the room feel alive by adding as much flowers and plants as you can, no corner should be spared. With the right combination of mirrors and lights, all that life will be able to bounce of all around the room. The room will talk to you.
I wanted to do a single big post, but unfortunately I couldn’t manage to finich all the things in time for such a post, so soon. So I guess I’ll be up to a second part. Maybe, who knows?, but I may find some more ideas in the meantime. For now, it’ll be all. That should be enough for now. So stay tuned for part II !
That’ll be all for today’s post. I really hope you like it. Thank you for passing by and reading. It means a lot to me.
I’ll talk to you soon in a next post,
Until then, take care of yourself ❤
Ady ❤

