
Before starting this blog, I have made over months a list of DIYs to make. A huge list ! Unfortunately, this DIY wasn’t in the list…The idea came in my head without warning and I simply did it.What is this DIY ? It’s a cardboard tea cart, very cute as a decoration, perfect to display small things. I really had fun making this one. And I love the result, it’s so cute ! =)
Anyway, let’s get started !! =D
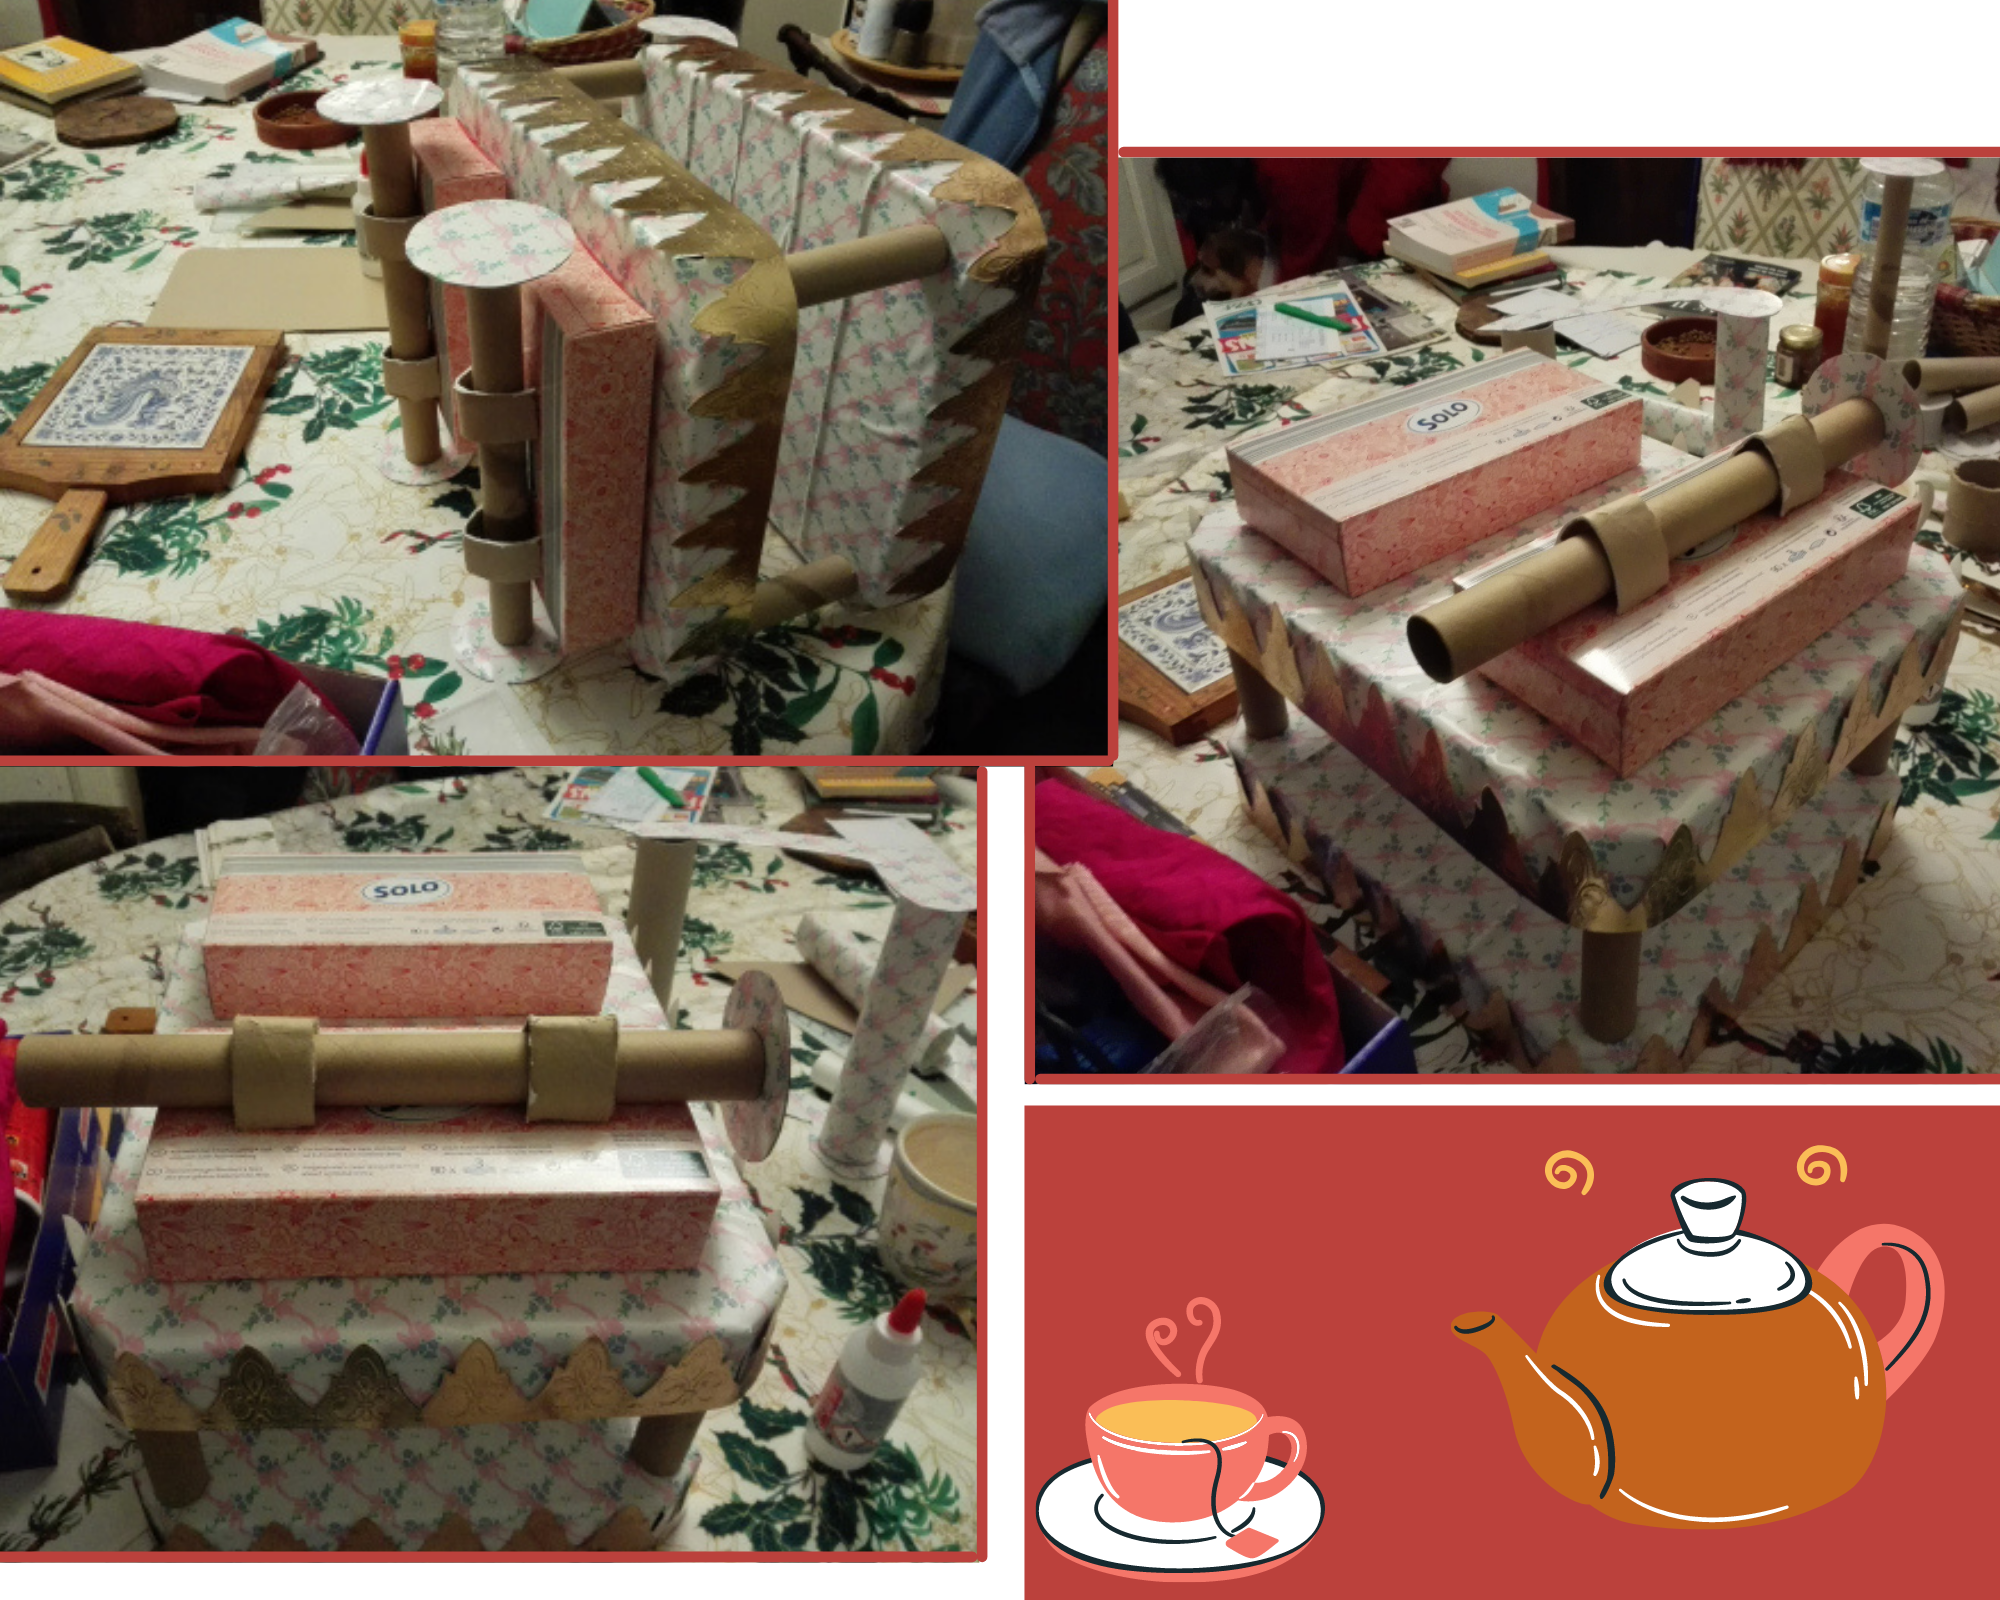
First, I took 2 cardboard boxes, to make the 2 trays of the cart.
I covered those 2 guys with some floral paper(mine was self-adhesive, but any paper would do the job ) and to complete the customizing I used golden paper crowns(you know, the ones provided with Epiphany galettes)
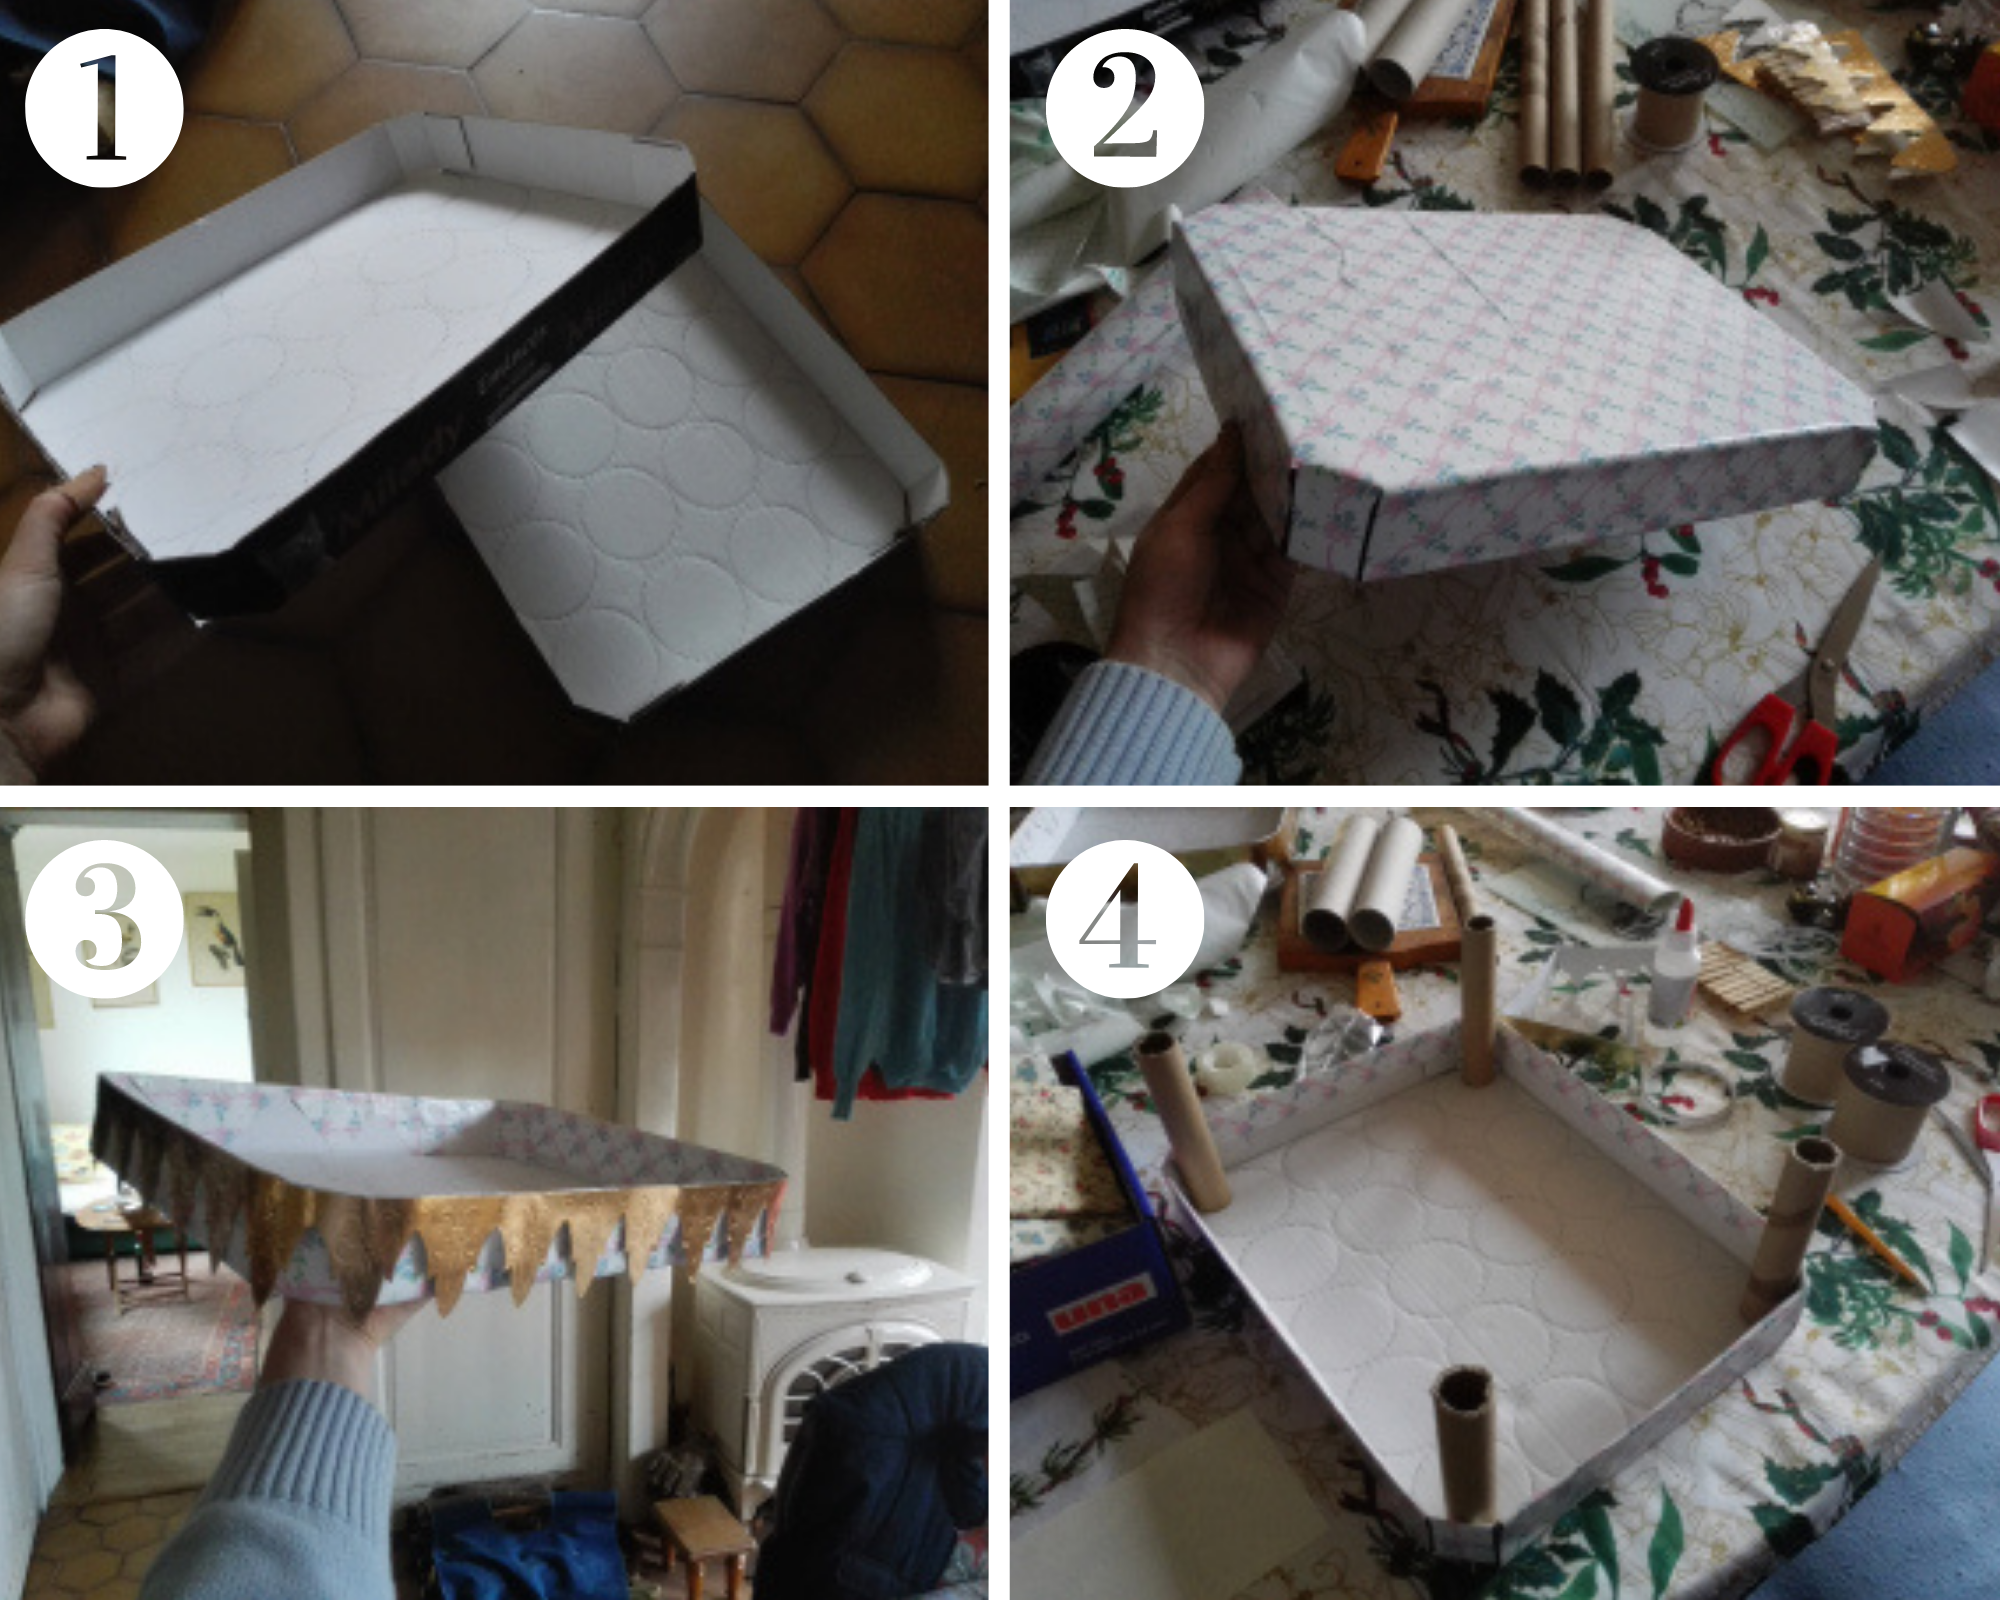
Then,I took 2 aluminium foil rolls, cut them in half and glued them at each angle of one “tray”.
Later, I realized that I forgot to paint those rolls in white… Shame on me !!! It would have been so much cuter. Anyway, it’s still cute like this. But if you re-do this DIY, don’t forget like I did. 😉
I let the whole thing dry a while, just to make sure that it wouldn’t collapse later.
Then I took the top tray and glued it on the 4 rolls, like so :
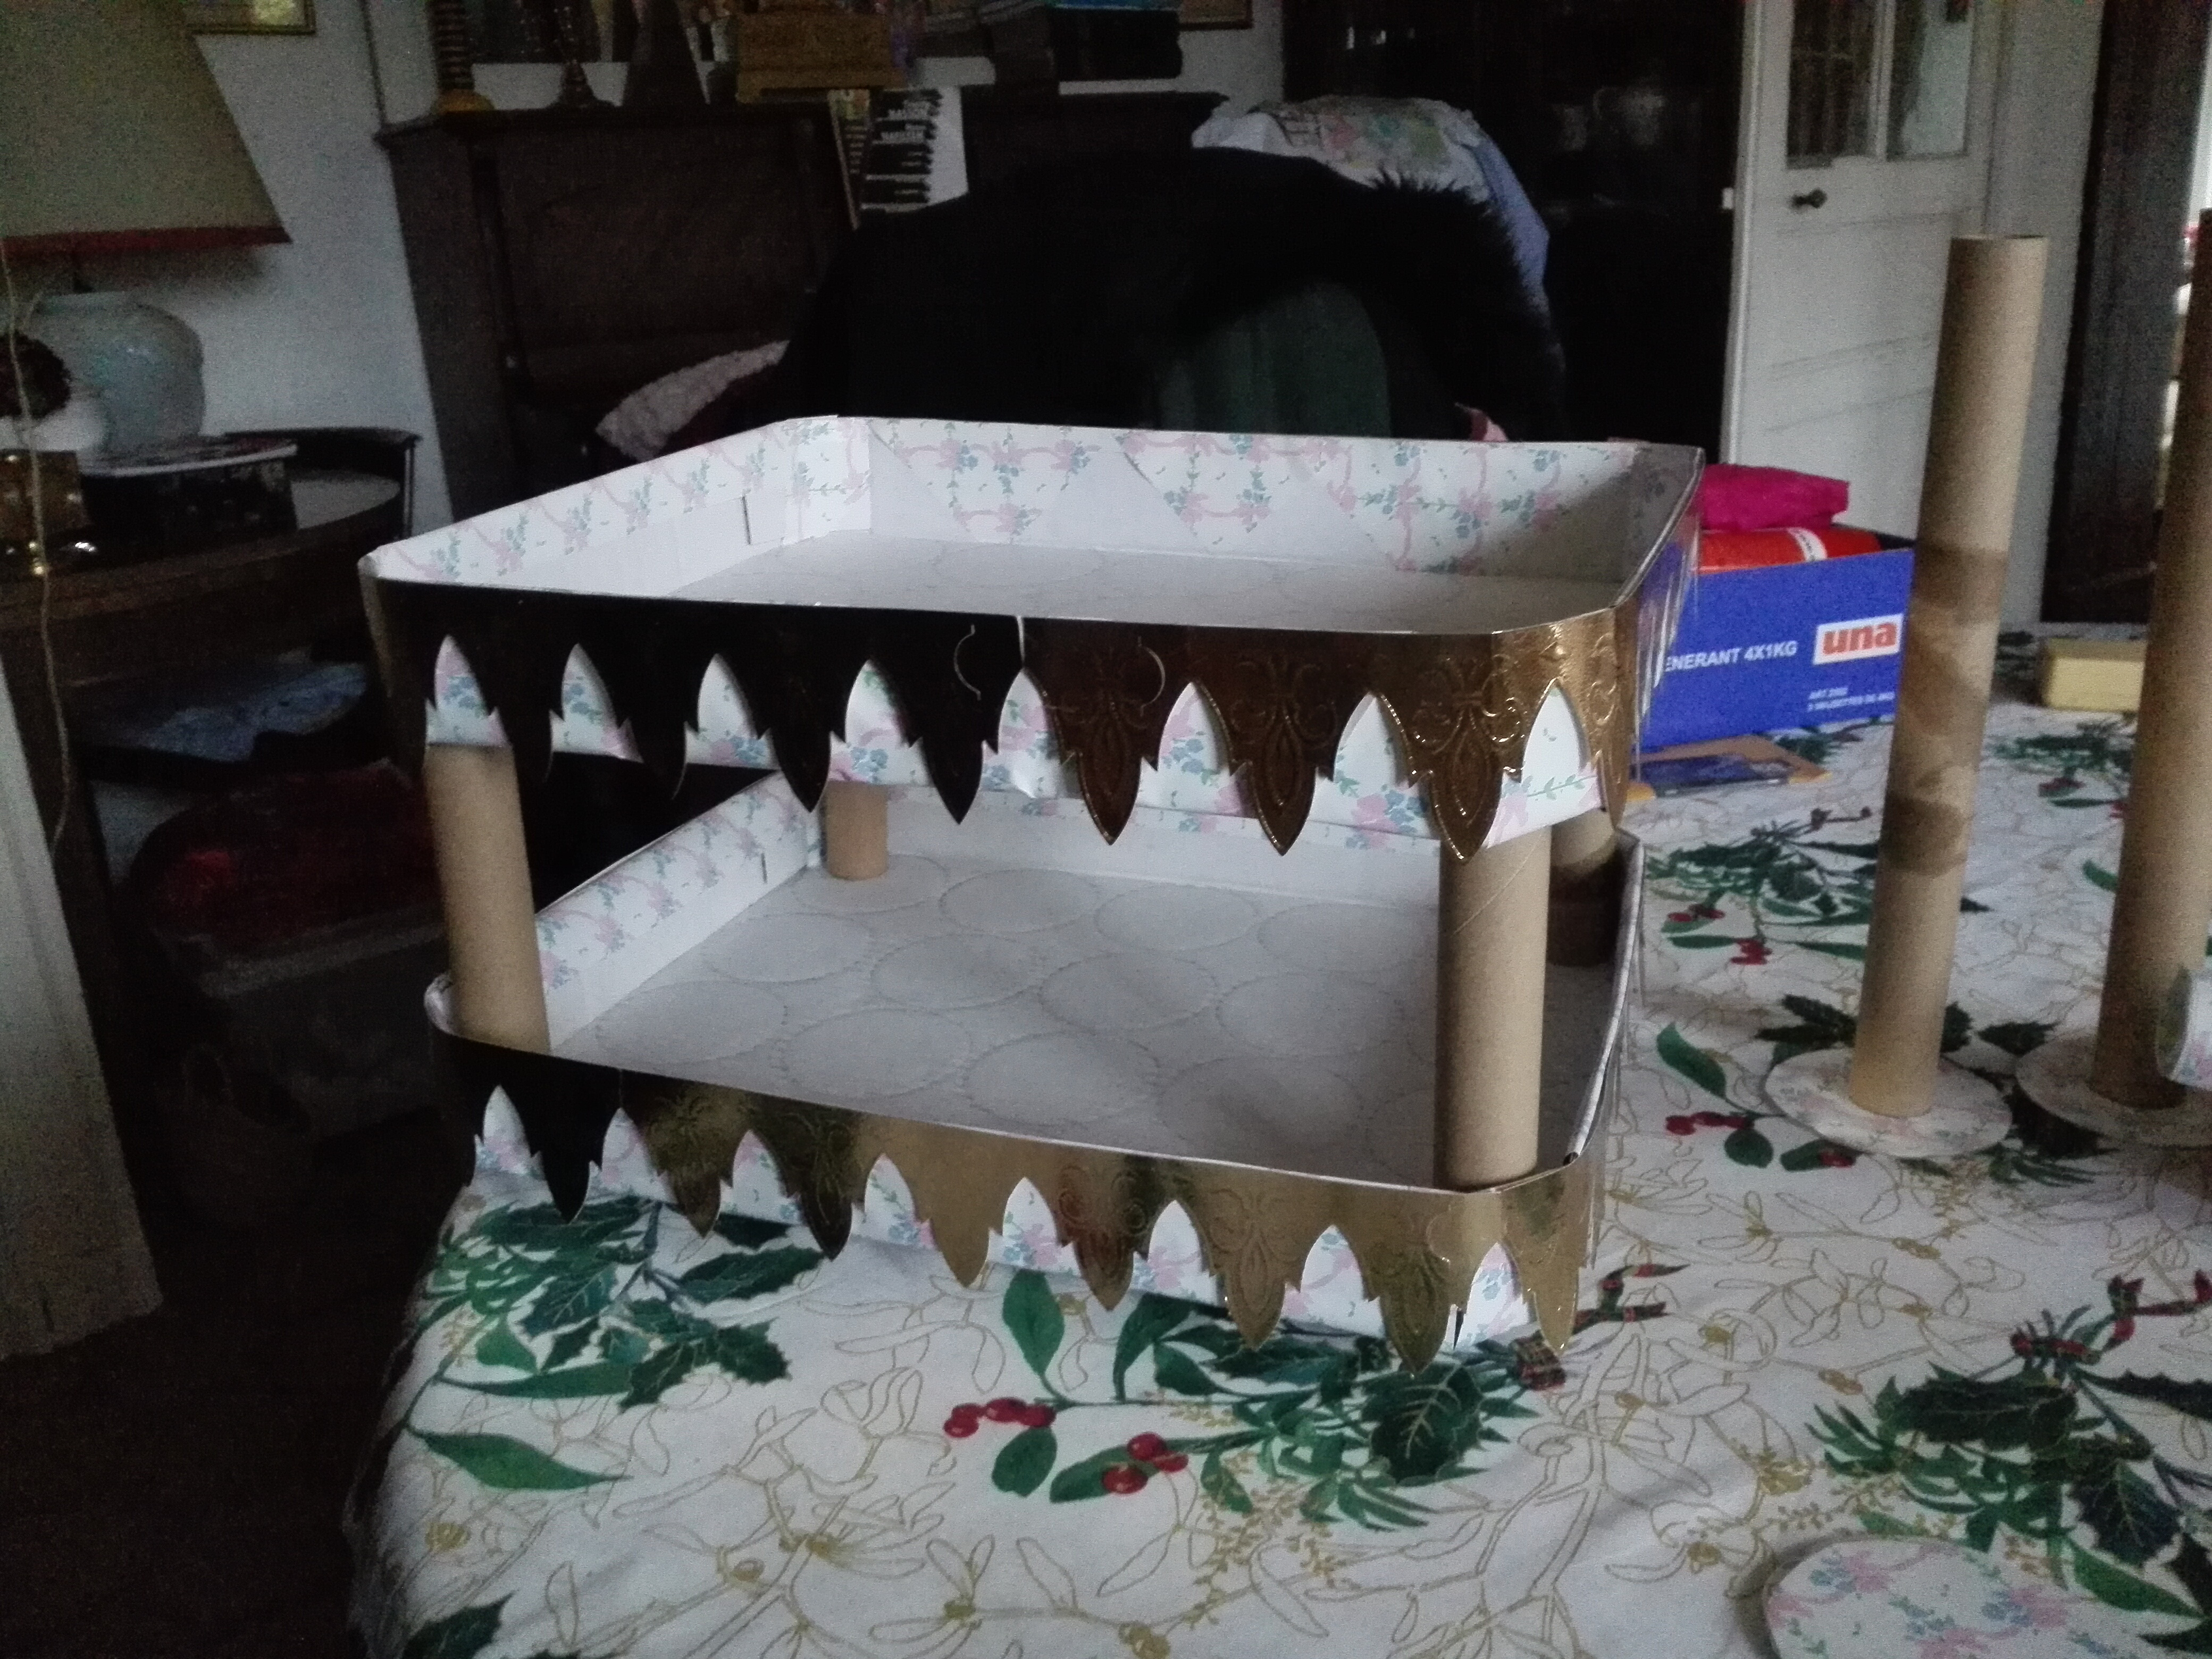
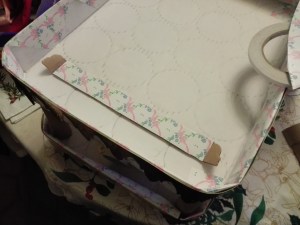
Note:On the top tray, I previously glued a piece of cardboard, you’ll see later why I did this.

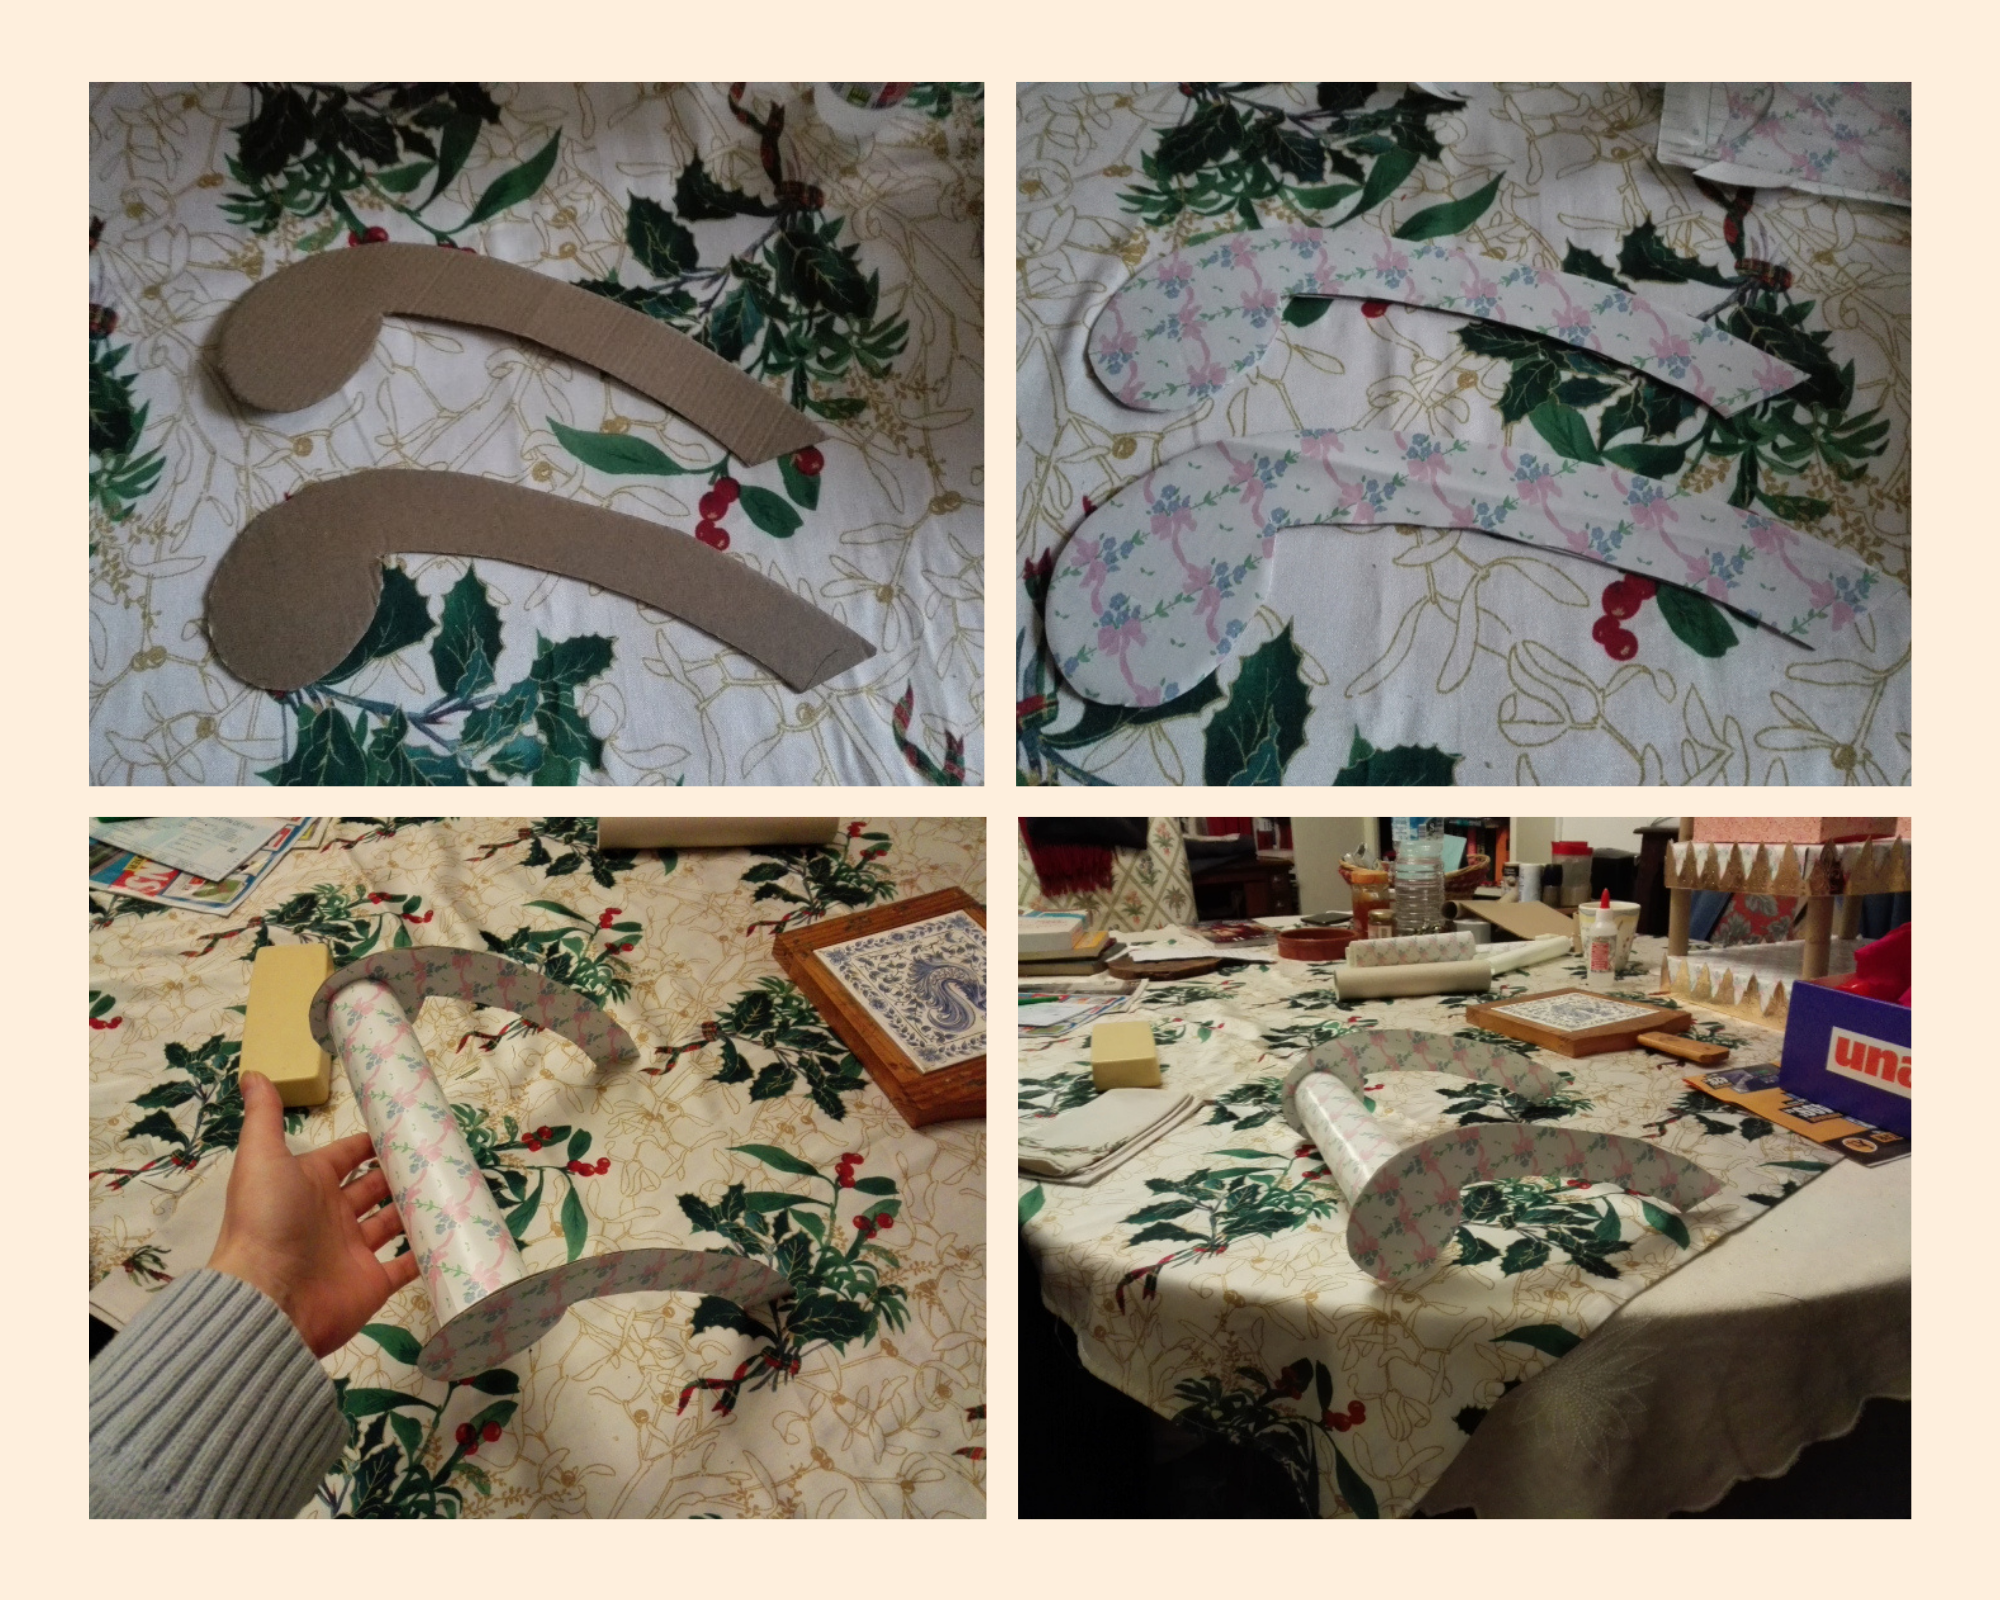
While this part was drying, I worked on the cart’s handlebar. On a separate piece of cardboard, I draw the 2 sides of the handlebar. Then I covered the 2 with paper, and a paper towels roll as well ( used to make the bar)
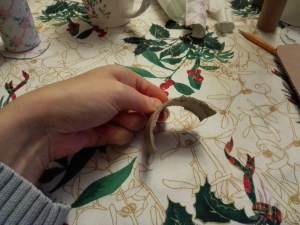
After that I glued the 3 parts together to get the finished handlebar.
Caution : Make sure that every component dryed enough before going to the next step. It’s very important, because it will prevent your creation from any collapse.
Now, we’re going to make the wheels, because a tea cart without wheels is not a tea cart anymore, is it ? I used (again) 2 aluminium foil rolls and 4 cardboard disks. Those were originally part of ribbon rolls. Previously, I covered the 4 disks with paper.(the same since the beginning 🙂 ) I glued 1 disk to each foil roll’s end.
I also cut 4 pieces of cardboard to make the rings intended to hold the wheels.
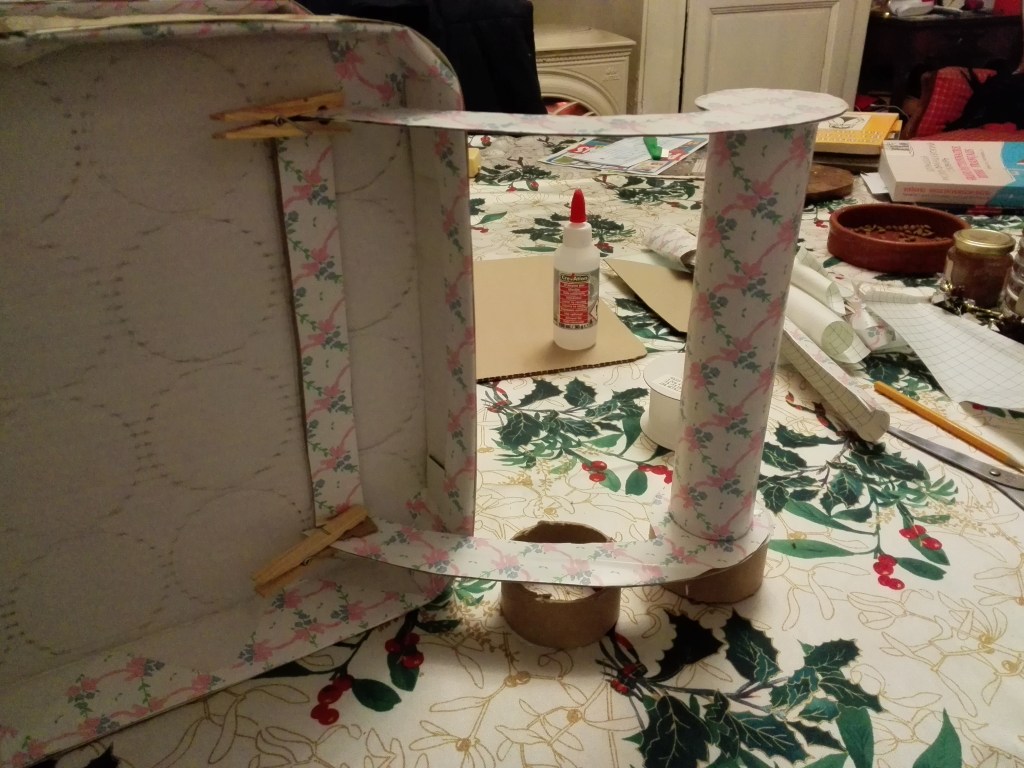
Afterwards, I turned over my little (not yet) cart. At this moment I realized that it was too low, I couldn’t put the wheels like this, the cart wouldn’t be able to roll. I had to find something…. So, before gluing the rings and the wheels to the cart, I glued 2 tissue boxes under the cart.Then I glued on it the rings(after pulling on the wheels, if not I wouldn’t have been able to do so)
As it was 4 pm, I went for my tea and some cookies and left my work to dry. When I got back, there was only one thing left. Gluing the handlebar to the cart.
Remember that strange piece of cardboard ? Now it’s getting useful. We’ll use it to fasten the handlebar to the cart, to make it secure. I used the 2 strips on the sides to glue the handlebar on.
I also used clothespins to hold the overall thing while it was drying(I was so afraid it would collapse)
I let it to dry about one day (just to be sure) and it was all done.
TADAAA !!!!!
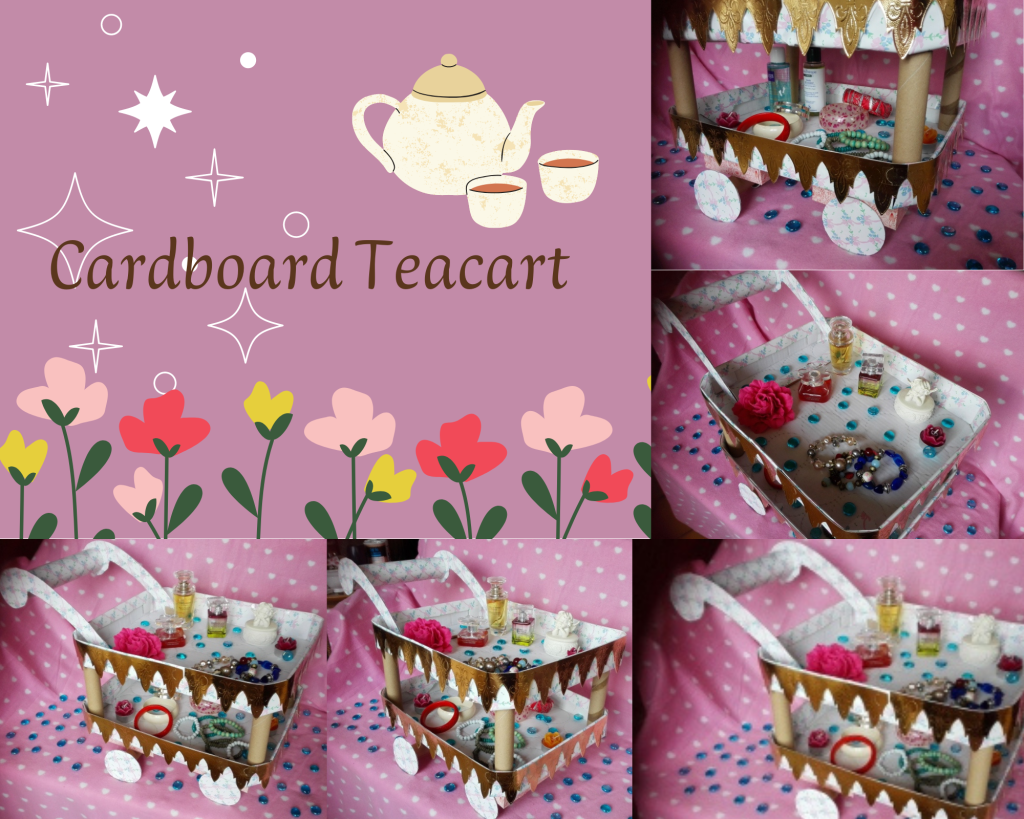
What do you think of that ? Seriously, I’m sooo proud. I LOVE how it turned out. It’s so cute !
Tell me in the comments if you like this DIY. I would love to hear your thoughts 🙂
Ok guys, that’s the end of this post. Hope to see you soon with another one 😉
And don’t forget to subscribe to the blog and to follow me on Instagram !
Bye everyone !!! ❤
Ady ❤

